Full Video Tutorial

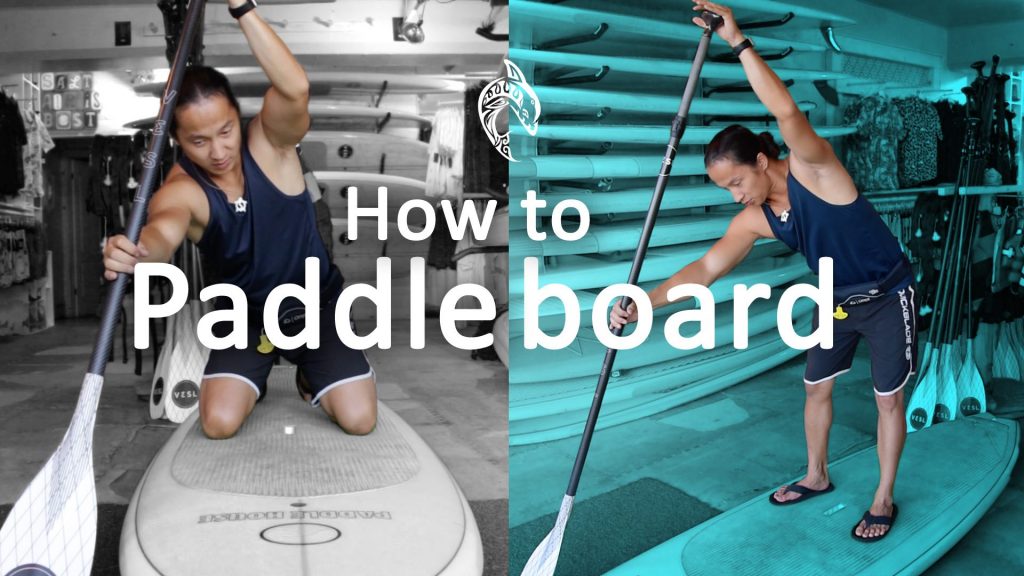
Welcome to Stand Up Paddle Boarding (SUP)! My name’s Eddie, and I’m a seasoned paddle board instructor and stand up paddle boarder from Southern California.
In this SUP guide, I’m going to cover EVERYTHING you need to know about paddle boarding to get started the right way.
We’ll be going over……
- Best Board for Beginners
- Safety Equipment
- Sizing Your Paddle
- Getting on Your Board
- How to Hold Your Paddle Correctly
- Standing Up on Your Board
- Paddle Technique
- Getting Back on Your Board After Falling
- Tips and Tricks
- Ways to Securely Transport
- Storing Properly
- Conclusion
BEST PADDLE BOARD FOR BEGINNERS
A common question when getting started is, “What size paddle board do I need?”
The most important thing is getting the right size board. Many people have a poor experience because they jump on a board way too small or way too advance for them.
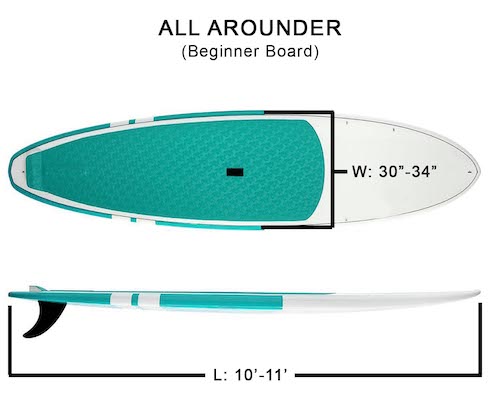
The best beginner stand up paddle board to start learning is called an All Arounder. It’s the best paddle board for a beginner because All Arounders are design to go anywhere and have a lot of extra stability.
The minimum length of the board is reflected a lot on your weight.
This also applies to Inflatable Paddle Boards. Interested in learning more about inflatables? Check out my blog, “6 Crucial Things You Need to Know Before Buying an Inflatable SUP.”
Length
If you are under 170 lbs (77.1 kg) = minimum length is 10ft ( 3 m)
If you are over 170 lbs (77.1 kg) = minimum length is 11ft (3.35 m)
Companies will share with you Maximum weight, however you don’t want to reach close to that as it greatly reduces stability and comfort.
Width
24”-26” = Advance Paddlers who paddle regularly and prefer speed over stability
27-30” = Intermediate Paddlers who have experience and paddle as a hobby
31”-34” = Beginner Paddlers who are getting started or those who prefer the highest stability and paddle very casually.
I always recommend a minimum of 32” wide for people who are just getting started. This is a nice stable width to begin learning. You won’t get frustrated or have to focus too much attention on balance.
PADDLE BOARD SAFETY EQUIPMENT
Make sure you understand the Life Vest Safety Laws before you venture out into the water and follow the rules of your city or country.
Even though I’m a very experienced and seasoned paddler, I always wear a floatation device at all times. Mother nature can be unpredictable at times. Respect her, and it might save your life.
Personal Floatation Device (PFD)
There are two types of PFD’s, a belt or a vest. Vests are more secure and reliable, however, a belt is much more comfortable giving you more range of motion. The belt PFD releases a CO2 cartridge that is released when the bright colored tab is pulled. Similar to ones on planes. These will inflate out around you to use in emergency.
Keep these important tips in mind.
VEST
Make sure it is secured so that it does not slide up and down. Test this because you don’t want to slide down into the vest making your emergency situation even more difficult.
INFLATABLE BELT
Make sure that the bright colored tab is positioned in front of you. The tab should never be behind you near your bum. Also make sure the cartridge is replaced when necessary, otherwise it does no good if you have a used or expired cartridge.
Leashes (Coiled vs Straight)
Leashes are not required, however, they do serve a really great purpose. Leashes are designed so you don’t have to chase after your board after taking a splash. It’s definitely recommended if you are surfing or facing turbulent water conditions. Let us go over the two types.
COILED LEASH
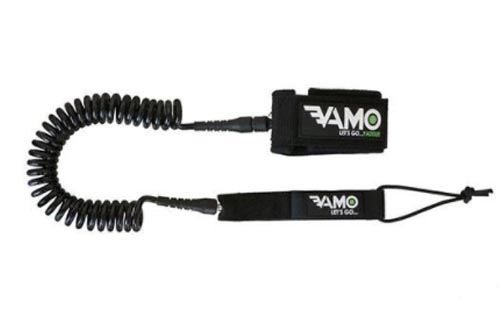
A coiled leash is designed for calm, flat water conditions. The leash is coiled and works as a gentle spring effect. This means if you take a splash, it will bring the board back to you. This makes it easier and quicker to retrieve your sup and get back on.
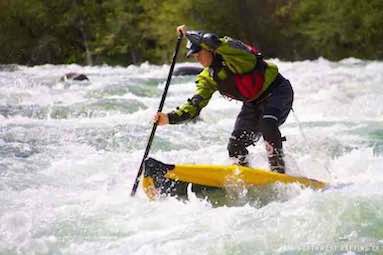
STRAIGHT LEASH
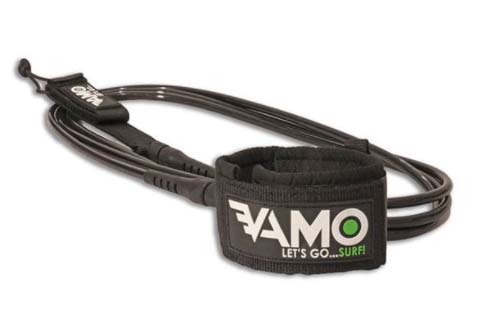
A straight leash is designed for more turbulent water conditions. It is used a lot in open ocean treks and surfing. In rougher water conditions, you do not want the board to spring back at you potentially causing injuries. This is why a straight leash is better here because it’s relaxed and reduces recoil from occurring.
HOW TO SIZE A PADDLE BOARD PADDLE
There’s two types of paddles in the paddle boarding world, pro and adjustable. When you are starting off you should get the adjustable paddle. Adjustables are great because you can change the height to suit your needs.
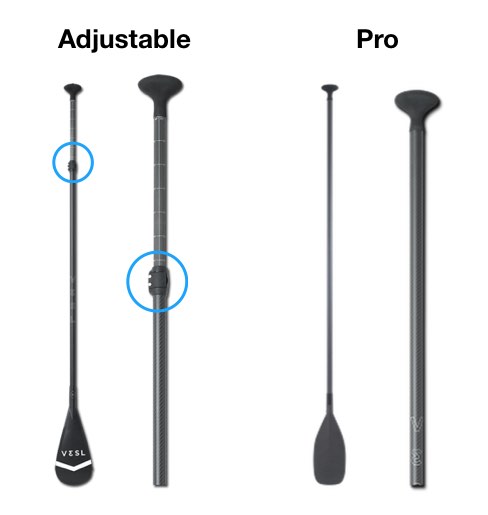
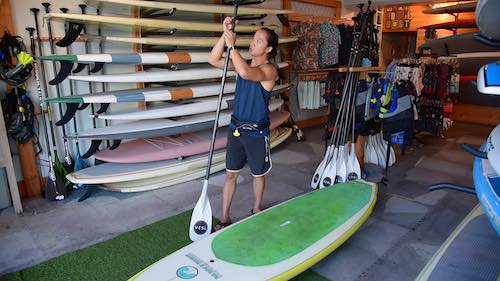
The simplest and easiest method is to raise your arm in the air with a slight bend then drape your wrist over the handle. This is a very fast and easy way to quickly gage the height you need. Once you’ve paddled more, then you can start moving the height around to figure out what’s best and most comfortable for you.
If you want something more precise, you can calculate the paddle height by adding 10% of your height.
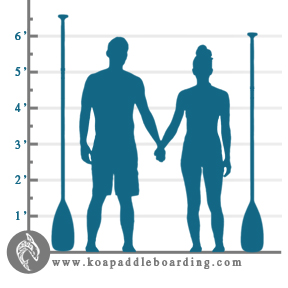
SUP PADDLE FORMULA | Your Height + 10%(Your Height) = Proper Paddle
So if you are 6ft tall then just convert that into inches which is 72″. Now do 10%(72″) + 72″ = 79.2″ or 6′ and 7.2″
If you’re looking to get a new paddle, check out the article “How to Find the Best SUP Paddle for You.” It will cover everything you need to know to buy the perfect paddle for your needs.
HOW TO GET ON A PADDLE BOARD
There are two main ways to launch from a paddle board, dock and beach. I’m going to go over how to get on your board from both locations.
Before you get on make sure the fin under the board is behind you. Never in the front.
Launching From the Dock
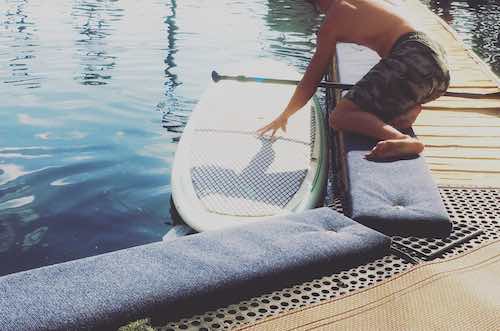
To launch from a dock it’s best to start by dropping down to your knees. Follow this step by step process if you don’t want to fall off by accident.
- Set the board down against the edge of the dock in the water.
- Hold the paddle with your right hand if the board is on your left side.
- Drop down to your knees.
- Reach across with your left hand and set it on the board.
- Swing your left leg over and place it on the left side of the board handle
- Bring your right leg over and place it on the right side of the board handle.
- Use your right hand to push off the dock and get yourself started.
*If you start with the board on your right side just reverse the left and rights from what was said above.
Launching From the Beach

Starting from the beach is actually much easier. Take the board and head out into the water.
The key thing to keep in mind here is make sure you are knee-deep in the water before mounting the board.
Getting on too early can cause you to sink the fin into the sand making it hard to move.
The other possibility is getting on too soon and sinking the fin down onto rocks, potentially damaging your fin or your fin box. Damaging your fin or fin box ruins the integrity of the board.
HOW TO HOLD A PADDLE BOARD PADDLE
Paddle Head Position
To get started, make sure the arch of the paddle head always faces forward. You want the flat part of the paddle to push you along without shoveling the water behind you.
How you hold the paddle is based on your position on the board.
Kneeling / Starting Position
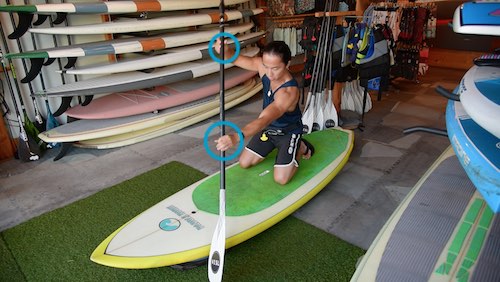
Divide the paddle by thirds. These markers are where you are going to grab the paddle. Make sure you always hold the paddle palms down and palms up.
Standing Position
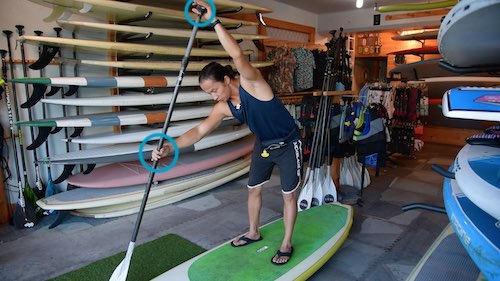
Divide the paddle by half. Grab the middle and hold it palms down. With your other hand, grab the paddle handle at the top.
*Holding your paddle in the wrong position can really hinder your paddling experience. Make sure you are always holding the paddle correctly.
HOW TO STAND UP ON A PADDLE BOARD
What good is a paddle board if you can’t stand up? In this section I’m going to get you standing up on a paddle board in 3 easy steps. I’m also going to share with you some tips and tricks to help your overall balance.
I suggest you practice paddling while on your knees to get accustom to the feel before attempting to stand.

1. Starting Position
Let’s start with the basics. Before you can attempt to stand, you need to find the handle located on the center of the board. The line that runs across the handle is known as the “Sweet Spot.” This is where you get the most balance and control on your board.
The starting position begins with your knees shoulder-width apart on both sides of the paddle board handle.
2. Frog Position
Now that you are in the right position on the board, put the paddle horizontally in front of you on the board.
You are going to tilt your weight forward, towards your hands. This is so you can distribute your weight evenly along the board. Putting too much weight on one side will make it too tippy.
Bring one leg up then the other. This is called the Frog position because that’s what you should look like. Now it’s time to move onto the standing position.
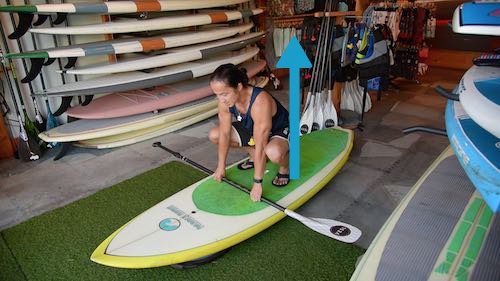
3. Standing Position
In order to stand you need to think about a squat. Many people make the mistake of leaning too far forward to stand. If you lean too far forward you have a good chance of falling forward and damaging your board. The goal here is to stand straight up as possible. Use your legs.
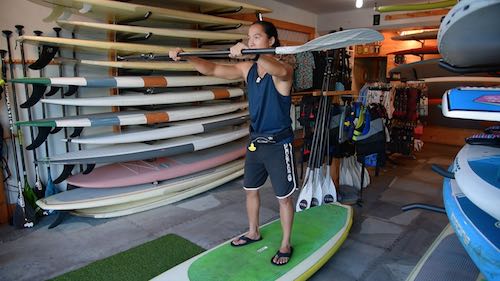
Once you successfully stand up. Switch your paddle position by grabbing it from the middle and the top. Make sure the arch of the paddle is facing forward at all times.
Step-by-Step Process
1. Knees on both sides of paddle board handle
2. Hold your paddle by thirds
3. Put Paddle Horizontally in Front of you
4. Tilt your weight onto your hands
5. Bring one leg up, then the other
6. Squat straight up
7. Hold your paddle from the top and half way down the shaft
There you have it! You are now standing up on a paddle board! Let’s move on to paddling.
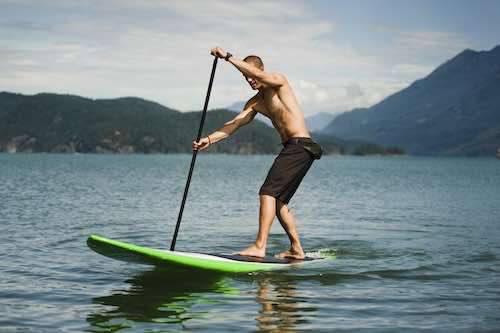
HOW TO PADDLE ON A PADDLE BOARD
In this section we’re going to cover the basic paddling techniques
- Going Straight
- Braking
- Turning Methods
Going Straight
The key start to paddling is making sure you fully extend your arms in front of you.
Next drive the paddle into the water and pull back. Make sure the whole head of the paddle is buried before pulling back.
A common mistake people do is not keeping their paddle close to the board during their stroke. You want it as close as possible because if you paddle too wide you lose traction which is the ability to maintain a straight course. A lot of new paddlers zig zag because of this.
You’ll do 3-5 strokes on one side then switch hands and do 3-5 strokes on the other side.
Make sure you trade hands each time you switch sides. Don’t cross your arms with your paddle. This makes it extremely inefficient and hard to do.
Braking

Braking on a paddle board is very simple. All you have to do is place the paddle behind you towards the tail and bury the entire head into the water.
Again make sure the whole head is buried. If you only have part of the paddle in the water, it won’t be very effective.
Turning
There are two main ways to turn on a paddle board. Each one is used for different purposes.
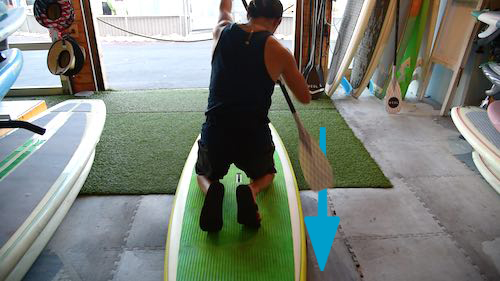
C-Stroke
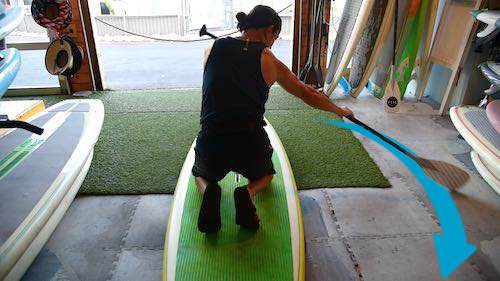
This technique is done while you are moving and gives you a wider turning radius.
When you want to turn, place the paddle head in the water in front of you. Now make a big, wide stroke. Think the bigger, the wider, the better. If you do small strokes, it will take you much longer to turn.
To turn to the left place the paddle to the right and vice versa. Think of it like place your hand on a wall and pushing off from it. You’ll always turn in the opposite direction of your push.
U-Turn
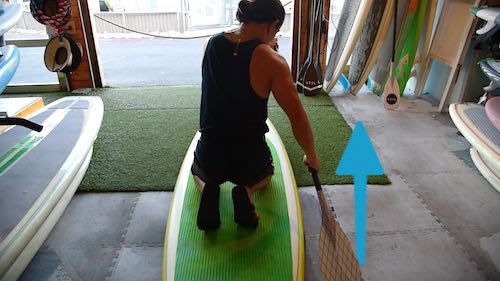
This technique is done while you are stopped. This technique slowly spins the board on an axis and gives you a more narrow turn in small spaces. Don’t try to do this one while you are moving because you have a good chance of falling off.
In order to do the U-Turn, place the paddle behind you near the tail exactly like you would if you were braking. Once the paddle has fully stopped, pull the paddle forward towards the nose. You may need to do this a couple of times until you have the desired amount of turn.
That’s it! That’s how you paddle on a paddle board.
HOW TO GET BACK ON YOUR PADDLE BOARD
You’ve taken a splash and are having a little difficulty getting back on. No worries! I’m going to help you through this one step at a time.
Steps to getting back on.
- Don’t worry about the paddle. It’ll float. Focus on getting back on the board.
- Swim to the side of the board. *Not the Tail or Nose.
- Reach with one hand and grab the handle in the middle of the board.
- Put your weight on your forearms and push down to lift your body a couple inches above the board.
- Kick your legs and, with your forearms, push your weight forward back onto the board.
- Rotate your body and use your arms to paddle.
- Retrieve your paddle.
*If you are wearing a lifevest or are a woman with a bigger chest, make sure to clear enough space above the board with your forearms before trying to get back on. Trying to drag your vest or chest across the board makes this process much more difficult.
PADDLE BOARDING TIPS AND TRICKS
Here are a couple of tips and tricks to help you improve faster and build your confidence on the water.
One Step at a Time
Just like starting anything, it’s easy to overwhelm yourself. Something I always share with my students is, “Every time you go out to paddle, focus on one thing you want to get better at. Keep practicing this one thing until you no longer have to think about it.”
Don’t try to remember and master everything at once. Our minds can only focus on so much at a time. Pick something, and do it until you are comfortable before moving onto the next thing.
Move Around on Your Board
A great way to get to know your board is by finding a day with calm conditions and practice moving up and down on it. This is great because it will improve your balance while also understand how your board moves and distributes your weight. Also, this is great for starting to learn the buoy turn on a paddle board.
Challenge Yourself
You want to know what’s great about paddle boarding? You can take more risks because unlike other sports if you fall off you can hit concrete and possibly break something.
With paddle boarding it’s just water. So don’t worry about taking a splash. Challenge yourself to get better and try new things. You’ll be surprised at what you can accomplish.
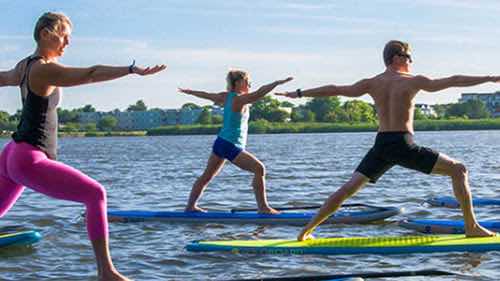
Try giving Paddle Board Yoga a shot and see how it can tremendously help both your mind and balance.
Have Fun!
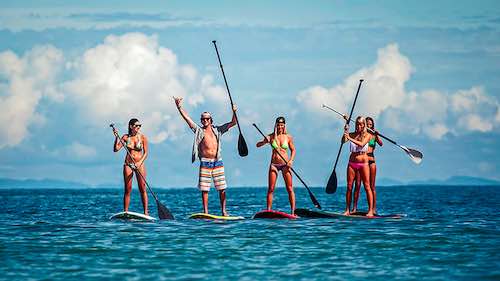
Unless you are a total couch potato, this amazing sport is for everyone. Embrace the experience, and let your worry and stress go. One thing I like to think about while my feet are dipped in the water is how lucky I am to get to have discovered SUP. Have fun! Try new things! Share it with people you care about! Life is short. Make the time to enjoy it.
HOW TO TRANSPORT YOUR PADDLE BOARD
Paddle boards are large and can be difficult to transport and store. I’ll share with you some ways that will make this job a lot easier.
Transporting a 9ft-14ft paddle board can be a handful. Aside from the traditional handle on each board. Here are a couple other ways to transport back and forth with your paddle board.
Car Racks
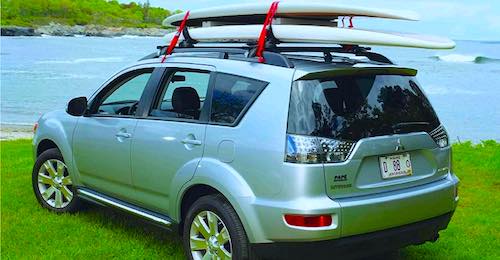
Most people transport their paddle boards using straps for their car. If you don’t have a rack on your hood you can lay towels down and run the straps through the window of the car.
Make sure the straps are very secured so the board does not slide back and forth. You don’t want to accidentally lose your precious cargo.
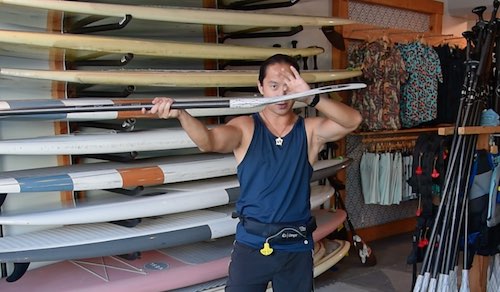
Shoulder Straps
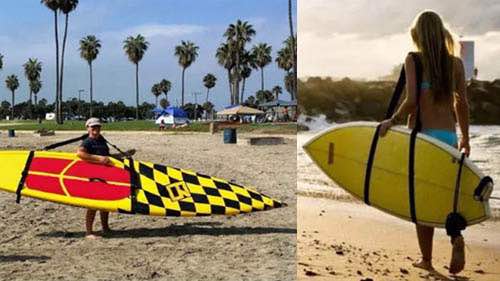
These are helpful if you need to walk a distance with your board. The straps slide over the paddle board and rests comfortable on your shoulders. This relieves the strain on your arms, and makes it easier to carry.
Bike Trailer
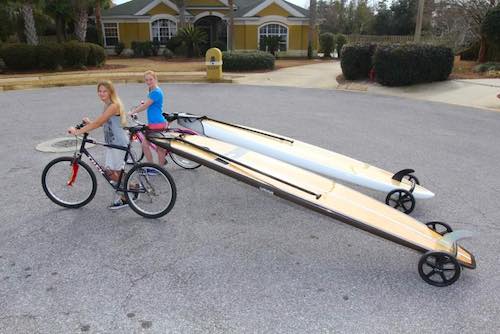
If you’re not near a beach or lake but don’t want to take the car then this is a great option for you. The trailers are small and compact and can easily strap to the back of your bike for easy travel.
HOW TO STORE YOUR PADDLE BOARD
I’m going to share with you some tips to storing your paddle board and what not to do. Let’s start with the do not’s.
Do Not
•Keep your board exposed to the elements. – If you are storing it outside make sure it is in a paddle board case. Weather and temperature can do a lot of damage over time to your board.
•Leave the board unsecured. – You don’t want to leave your board only to return to find it has fallen on your car or something else. Doing so can damage your boards and anything else it hits along the way. Always make sure your board is very secure and won’t slide around when storing it.
Storing Options
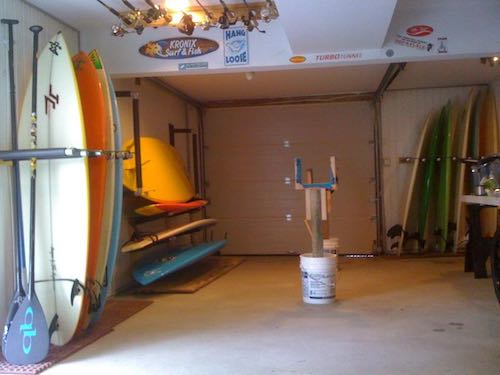
•Lean it against the garage wall. This is the most simple method. Tip: Take the fin off so it doesn’t catch anything.
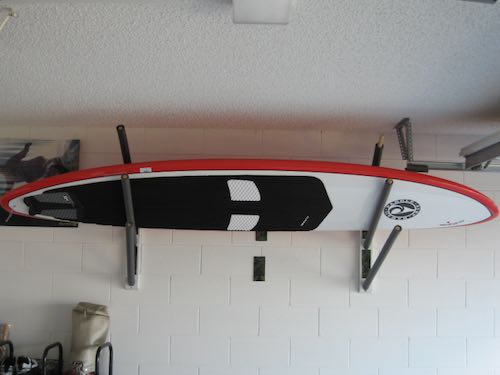
•Build Garage Rack. This method is generally used near the ceiling and above the car to make space in the garage.
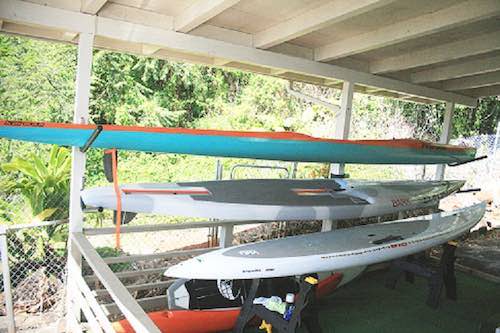
•Build Outdoor Rack. Commonly used in areas with mild climate. Make sure to have your board covered to reduce wear and tear.
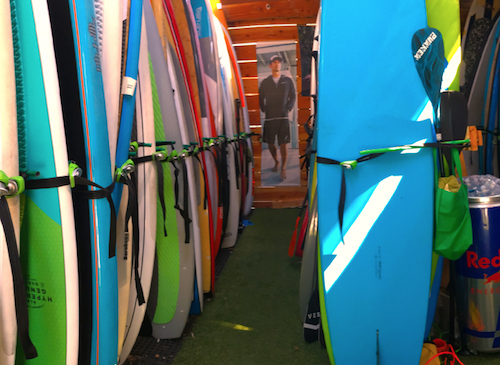
•Find a Storage Facility. These are popping up more and more. Check your neighborhood listing to see if there are paddle board storage facilities near you.
CONCLUSION
That’s it! Everything you need to know to get started in Stand Up Paddle Boarding! Let’s recap all that you have learned!
✓Start with an All Arounder board for the most balance and control.
✓Make sure your PFD is tight and snug, and parts are all operational.
✓Make sure your paddle is 10% taller than your height.
✓Be at least knee-deep in water before getting on your board.
✓Follow the three steps to stand up.
✓To go straight paddle as close to the board as possible.
✓To turn make a big C and paddle as wide as possible.
✓Have fun and challenge yourself!
✓Alway secure your board when transporting and storing.